
How to Clean Indoor Outdoor Rugs: Quick, Easy Guide
Donna MaloneBefore you can even think about scrubbing, let’s talk prep. Getting your rug truly clean starts with a few key steps: figuring out exactly what it’s made of, shaking out all that loose dirt, and doing a quick spot test. Once that’s done, you can move on to the real cleaning—a gentle detergent, a soft brush, a good rinse with the garden hose, and letting it dry completely in the sun to keep mildew away.
Getting Your Cleaning Kit Together
Taking a few minutes to prepare before a single drop of water touches your rug can be the difference between a successful refresh and a cleaning disaster. Think of it as a pre-flight check for your rug. If you just jump in without the right supplies or knowing your rug's material, you could end up with faded colors, damaged fibers, or a sticky residue that just attracts more dirt.
Proper prep is the foundation of a safe and effective clean. It simplifies the whole process, turning what could be a frustrating chore into a manageable and even rewarding task. Having everything you need within arm's reach means you won’t have to stop mid-scrub to hunt down a brush or more soap.
First, Know Your Rug's Material
The very first thing you need to do is figure out what your rug is made of. Most indoor-outdoor rugs are crafted from tough synthetic materials built to handle the elements, but they aren't all created equal. The material dictates how you should clean it.
Here’s a quick reference guide to help you identify what you're working with and the best way to tackle the job.
Rug Material Cleaning Cheat Sheet
| Rug Material | Key Characteristics | Best Cleaning Method |
|---|---|---|
| Polypropylene (Olefin) | Highly durable, resists stains, mold, mildew, and fading. The workhorse of outdoor rugs. | Can handle vigorous scrubbing with a soft brush and mild soap. Rinses easily with a hose. |
| Polyester | Soft feel with vibrant, fade-resistant colors. Good stain resistance. | Gentle scrubbing is best. Avoid harsh chemicals that could damage the fibers' soft texture. |
| Nylon | Extremely resilient and durable, perfect for high-traffic areas. | Holds up well to scrubbing but can be prone to fading. Always spot-test for colorfastness. |
| Sisal or Jute | Natural fiber, textured look. More absorbent and prone to water stains. | Best for dry cleaning methods. Avoid soaking; use minimal water for spot cleaning and dry immediately. |
Always check the manufacturer's tag on the back of your rug first for specific material info and cleaning instructions. If the tag is long gone, you can often find the details by looking up the product online. Our guide to the best indoor outdoor rugs also dives into common materials and their characteristics.
The All-Important Spot Test
Once you know your rug’s material, the next non-negotiable step is the spot test. This is your insurance policy against accidental damage. Mix up your cleaning solution and apply a tiny amount to a hidden area, like a back corner or the underside.
Let it sit for about 10-15 minutes, then gently blot or scrub and rinse it off. After it dries completely, check for any color bleeding, discoloration, or weird changes in texture. If everything looks exactly as it should, you’re good to go.
Expert Tip: Never, ever skip the spot test, even if you’ve cleaned the same rug before. New cleaning products, sun exposure, or even air pollutants can change how the rug's dyes react over time. It’s a two-minute step that can save you a world of hurt.
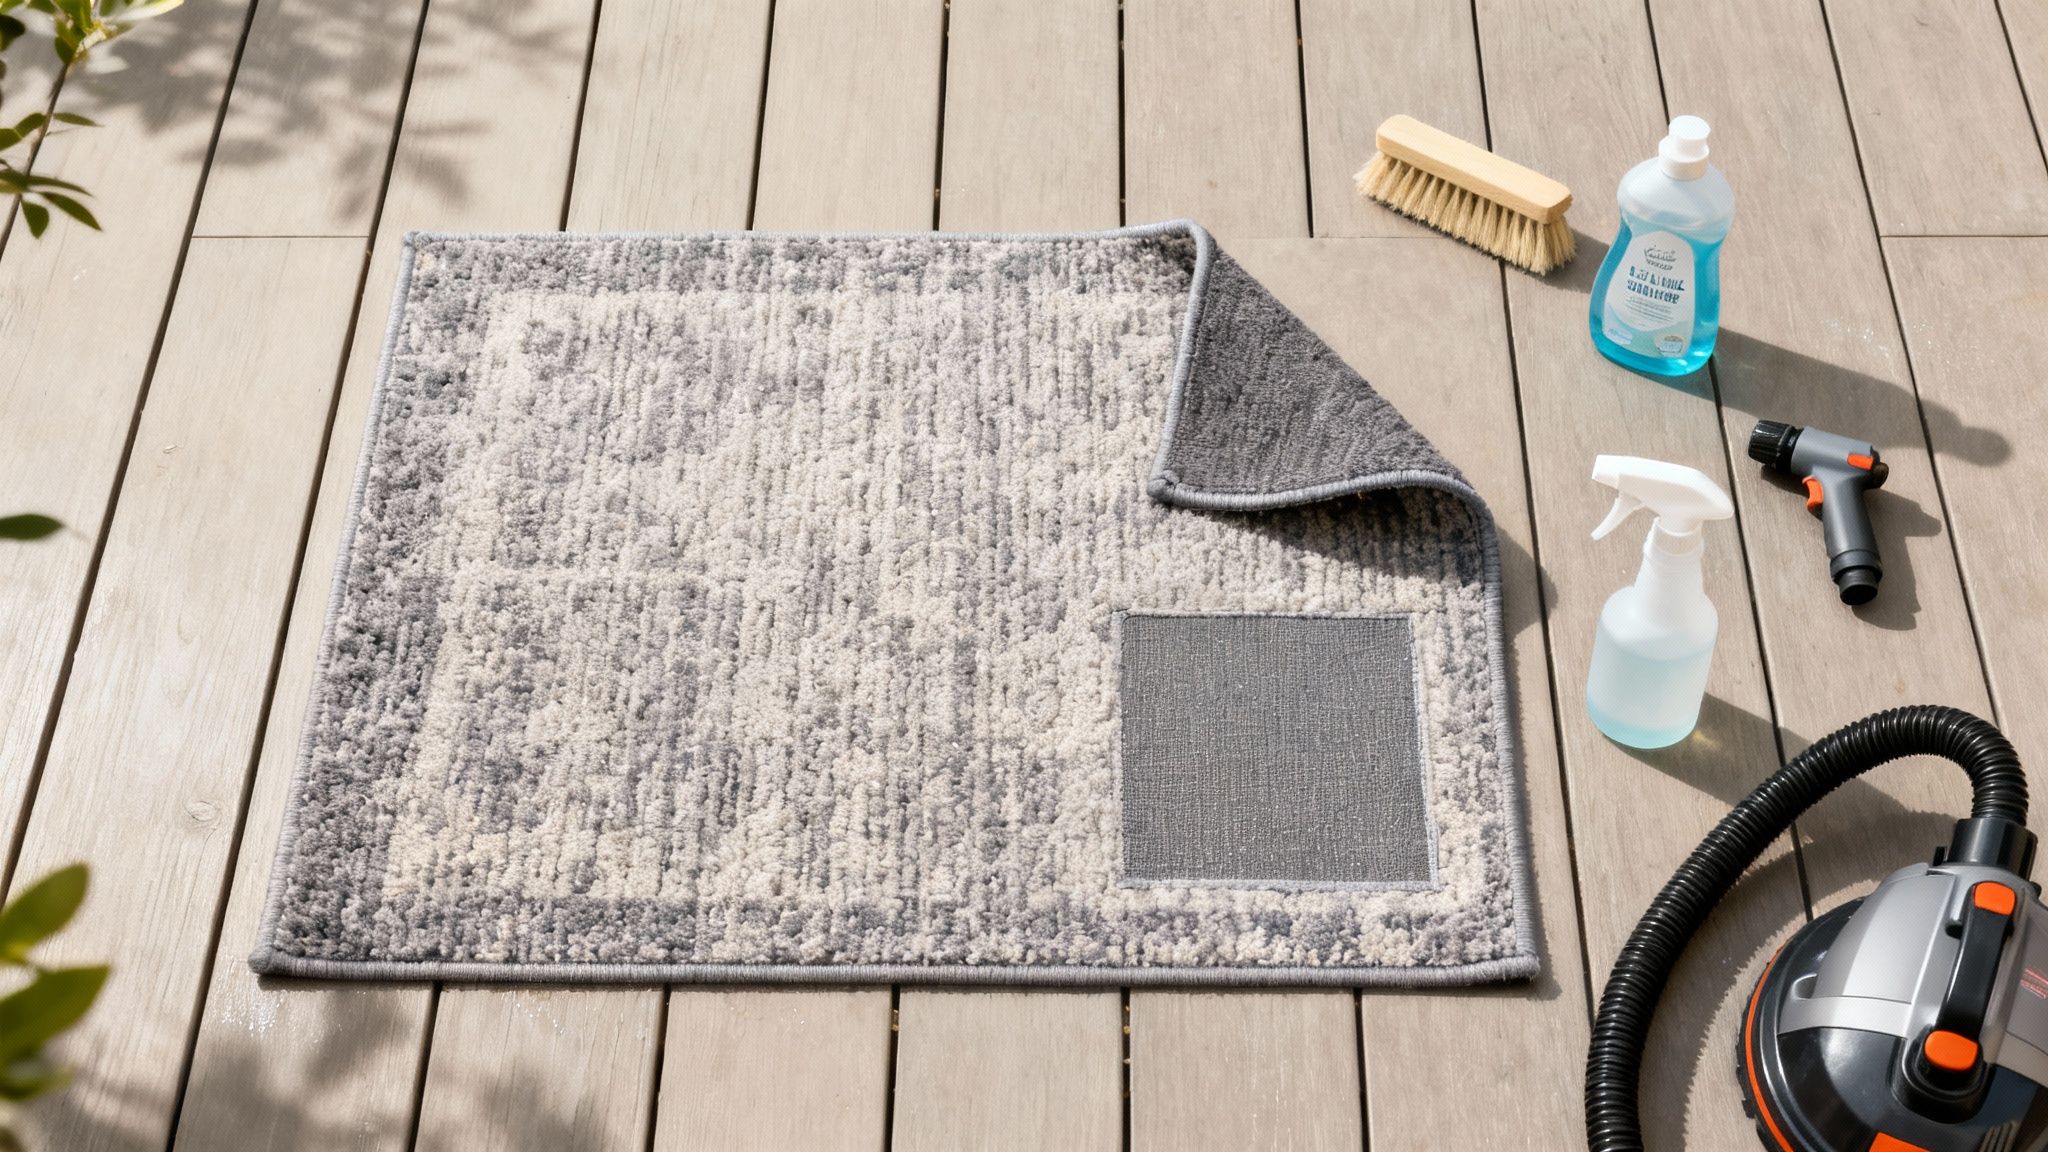
Your Essential Cleaning Checklist
With the prep work done, it's time to gather your tools. You don't need a lot of fancy equipment; a few household staples will get the job done right.
-
Vacuum or Broom: Your first line of attack for removing all the loose dirt, dust, and debris.
-
Soft-Bristle Brush: A brush with soft nylon bristles is perfect for getting into the weave and scrubbing without damaging the rug fibers.
-
Gentle Dish Soap or Mild Detergent: Look for a pH-neutral soap without any bleach or harsh chemicals. Simple is better.
-
Bucket: Just a standard bucket for mixing your cleaning solution.
-
Garden Hose with a Spray Nozzle: Absolutely essential for a thorough rinse that gets all the soap out.
-
Wet-Dry Vacuum (Optional): If you have one, this can speed up the drying process significantly and help pull out deep-down grime. The market for these tools is growing, reflecting how much people value a deep clean—the carpet cleaner market was valued at USD 641 million in 2023 and is projected to hit USD 1,082 million by 2033.
Mastering Everyday Rug Maintenance
The real secret to keeping an indoor-outdoor rug looking great for years isn't some marathon cleaning session. It's all about the small, consistent things you do every week. This kind of preventative care stops dirt, grime, and sun damage from ever getting a real foothold.
Think of it this way: a little effort now saves you from a massive scrubbing job later. These simple habits keep messes from becoming permanent stains and prevent the fibers from looking dull and tired. It’s about working smarter, not harder.
The Power of a Regular Shake-Out
Before you even plug in the vacuum, start with a good, old-fashioned shake. Honestly, this is the single best way to get rid of all the loose stuff that settles on your rug—dust, crumbs, pet hair, you name it.
If your rug is a manageable size, just take it outside and give it a few vigorous snaps. For those bigger, heavier rugs, drape it over a porch railing or sturdy fence and beat it with a broom handle. You’ll be shocked at what comes flying out. This clears the way for your vacuum to tackle the more embedded dirt.
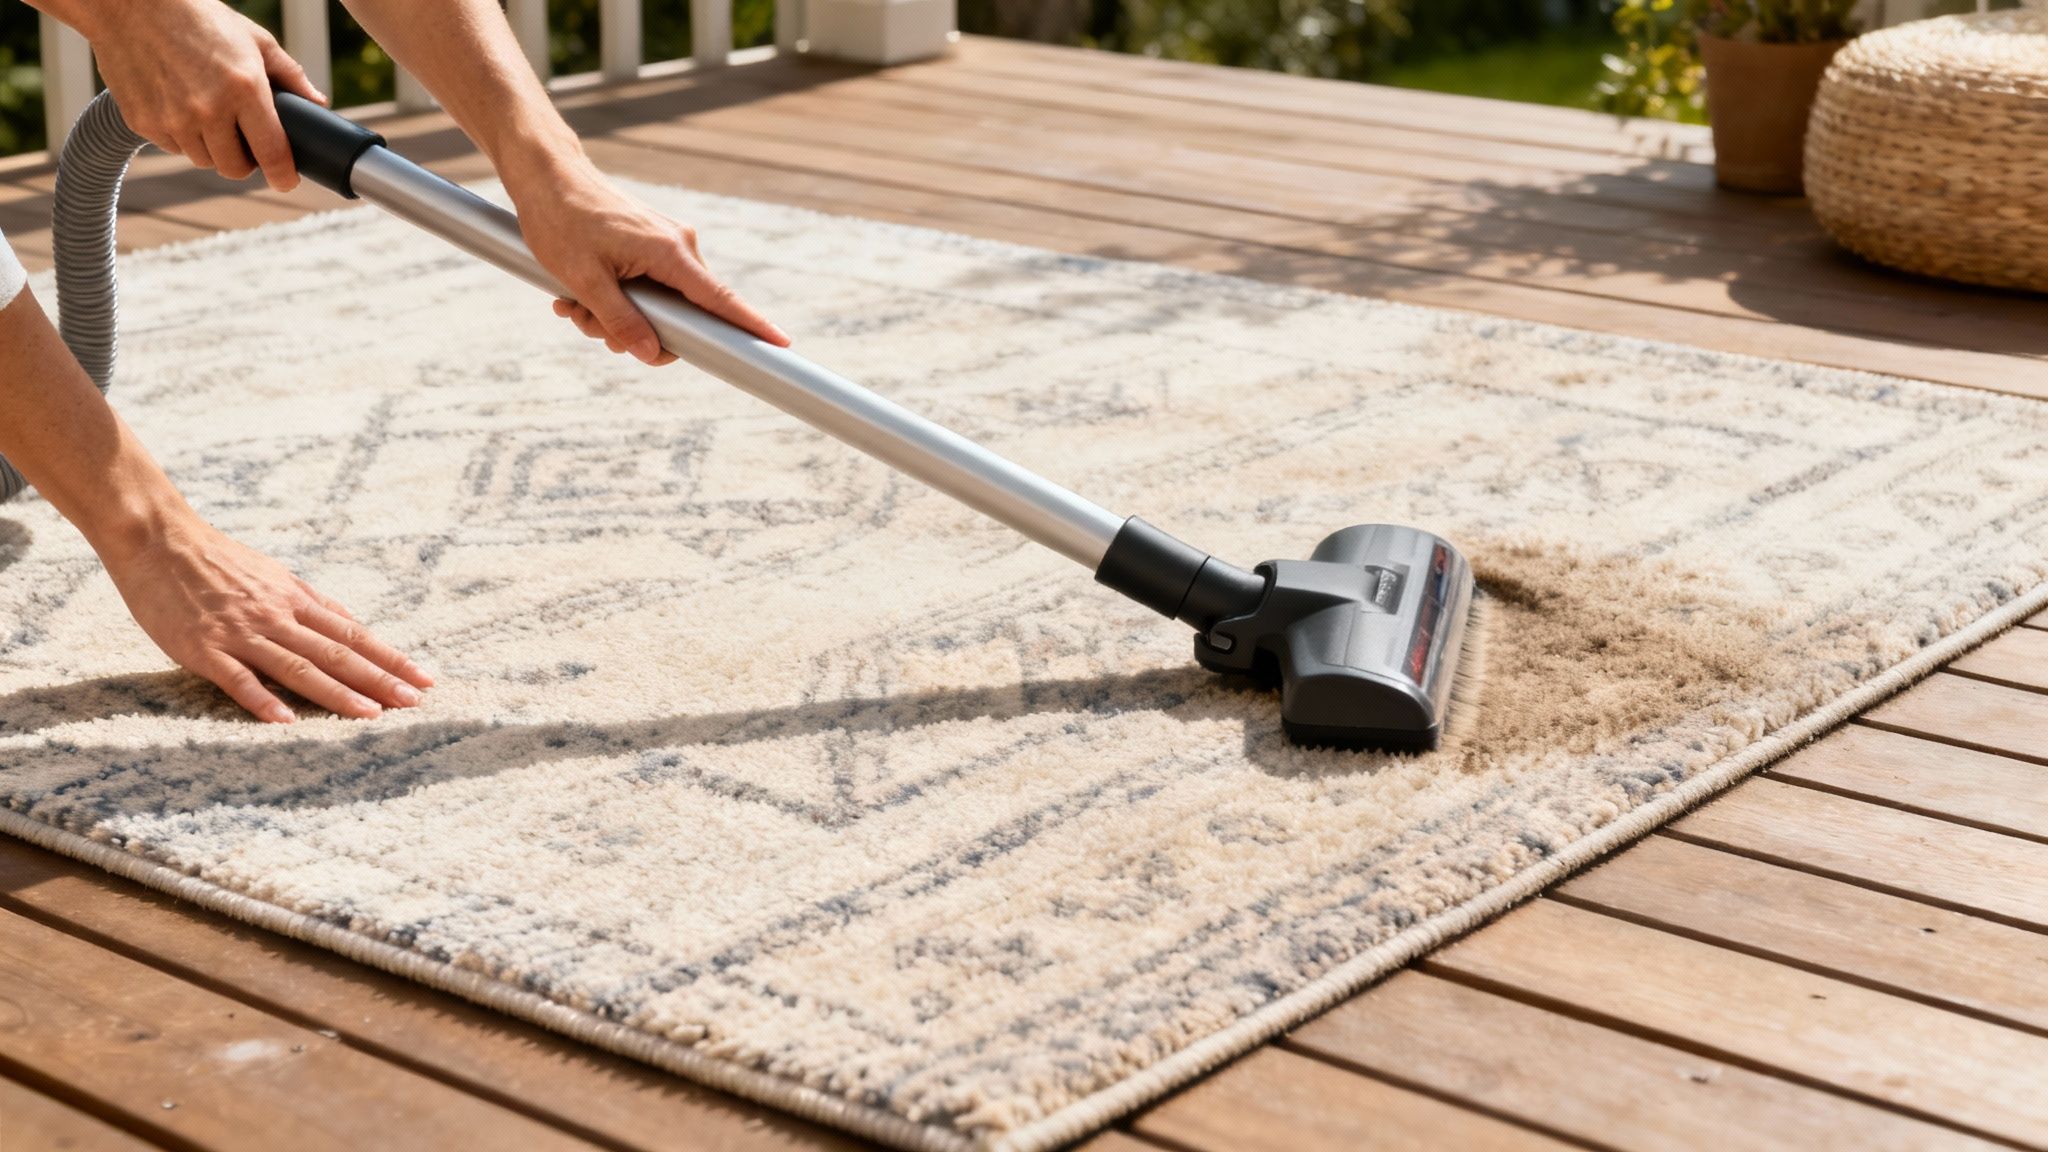
Smart Vacuuming Techniques
Regular vacuuming is your number one defense against the gritty dirt that grinds down rug fibers over time. For rugs in high-traffic spots, a quick vacuum once or twice a week makes a huge difference.
But how you vacuum is just as important as how often.
-
Turn Off the Beater Bar: This is critical. The spinning brush on a vacuum is way too harsh for the woven texture of most indoor-outdoor rugs. It can easily cause snags, pulls, and premature fraying.
-
Use Suction Only: Set your vacuum to its "hard floor" setting or use an attachment that lifts dirt with suction alone. It's much gentler on the rug's construction.
-
Go in Multiple Directions: If you only vacuum back and forth, you're only cleaning one side of the fibers. To get everything, make overlapping passes north-to-south, and then switch to an east-to-west pattern.
For more great tips that apply to all sorts of rugs, check out these best ways to clean area rugs at home.
The Art of Quick Spill Response
It's going to happen. Someone will knock over a glass of iced tea, or the dog will track muddy paws across the sunroom. The trick to keeping a simple spill from becoming a permanent stain is acting fast.
Your goal is to lift the spill up, not push it in. And always remember the golden rule: blot, don't rub! Scrubbing a fresh spill just grinds it deeper into the fibers and makes the stain bigger.
My Go-To Tip: I keep a little "spill kit" in a basket near the patio door with clean cloths, a spray bottle of plain water, and a tiny bottle of mild dish soap. The moment a spill happens, I grab a dry cloth and press down firmly to soak up as much as I can. I always work from the outside edge of the spill toward the center to keep it from spreading.
Rotate Your Rug for Even Wear
Just like the tires on your car, your rug needs to be rotated. Any part of the rug that gets hit with direct sun will eventually fade, and the paths people walk most will show wear first.
By simply rotating the rug every 3 to 6 months, you distribute that sun exposure and foot traffic evenly across the entire surface. It's a ridiculously easy step that makes a massive impact on how long your rug looks vibrant and new.
Your Deep-Cleaning Playbook for a Full Refresh
When a good shake-out and regular vacuuming just aren't cutting it anymore, it’s time for a deep clean. Think of this as the full reset your rug desperately needs after a long season of foot traffic, pollen, and patio parties. Don't worry, this is far less intimidating than it sounds—all you really need are a few basic tools and a bit of elbow grease.
For most synthetic indoor-outdoor rugs, the most reliable method is the classic garden hose and mild soap approach. This is how you flush out all that deep-seated grime a vacuum can't touch, bringing your rug’s color and texture back to life.
Setting Up Your Cleaning Station
First things first, find a good spot to work. You'll want a clean, flat surface that can get wet and has decent drainage. A sloped driveway, a clean patch of lawn, or a large patio are all great options. I'd recommend avoiding a wooden deck if you can; the constant water flow and soap runoff can sometimes cause issues for the wood.
Before you even think about getting the rug wet, give it one last, thorough sweep or vacuum on both sides. This gets all the loose stuff—leaves, dust, pet hair—out of the way so you can focus on the embedded dirt when you start scrubbing.
The Gentle Wash and Scrub
Alright, time to get down to business. Lay your rug flat and give it a good pre-rinse with your garden hose, soaking it from end to end. This initial soak helps to loosen up the stubborn dirt that’s been trapped in the weave for weeks.
Next up is your cleaning solution. In a bucket, mix a small amount of mild, pH-neutral dish soap with warm water. You're aiming for a gentle solution, not a bucket overflowing with suds. Too much soap is a pain to rinse out and leaves behind a sticky residue that will actually attract more dirt down the road.
A Note on Soap: Resist the urge to grab harsh chemicals, bleach, or heavy-duty detergents. These can easily strip the color right out of your rug's fibers and degrade the material over time, seriously shortening its lifespan. Simple, gentle soap is truly all you need.
Using a soft-bristle brush, start applying the soapy water and scrubbing the rug in sections. I find that working in gentle, circular motions works best to lift the dirt without fraying the fibers. Make sure to give high-traffic areas and any lingering spots a little extra attention. Once you've done the top, flip the rug over and do the exact same thing on the back.
Rinsing and Other Cleaning Options
This is probably the most important part of the whole process. A thorough rinse is absolutely critical to get every last bit of soap residue out. Using the spray nozzle on your garden hose, rinse the rug from one end to the other. Keep going until the water runs completely clear and you see zero suds.
For a beautiful and durable option that stands up well to this kind of cleaning, you might consider something like this abstract washable indoor outdoor area rug, which is designed for easy maintenance.
Once the top is clear, flip the rug again and give the back an equally thorough rinse. This ensures no soap gets trapped in the foundation of the weave.
Using a Pressure Washer (Safely!)
For a really grimy or large rug made of something tough like polypropylene, a pressure washer can be a huge time-saver. But you absolutely have to be careful here.
-
Lowest Setting Only: Always, always use the lowest pressure setting your machine has.
-
Wide-Angle Nozzle: Stick with a 40-degree (white) or wider fan nozzle to spread out the pressure.
-
Keep Your Distance: Hold the nozzle at least 12-18 inches away from the rug’s surface.
-
Stay in Motion: Never blast one spot. Use continuous, sweeping motions across the rug.
I can't stress this enough: do a spot test on a small, hidden corner before you go all-in. Using a pressure washer incorrectly can shred the fibers, cause permanent damage, and will almost certainly void your warranty.
When to Call in a Professional
Sometimes, a DIY job just isn't going to cut it, or maybe the rug is too delicate for you to feel comfortable tackling it. If you're dealing with a very expensive rug, a natural fiber like jute, or a monster stain that just won't budge, calling a professional is a smart move.
There's a reason the professional cleaning industry is booming. The global market was valued at USD 55,160.6 million in 2022 and is only expected to grow. The pros have specialized equipment and cleaning solutions that can remove an estimated 98% of pollutants without risking damage. You can learn more about the growth of professional cleaning services on Fortune Business Insights.
How to Tackle Tough Stains and Spills
We’ve all been there. The cookout is going great, and then a greasy burger takes a nosedive onto your patio rug. Or maybe a guest gets a little too animated and sloshes red wine everywhere. These moments feel like a mini-disaster, but they don’t have to spell the end for your rug.
https://www.youtube.com/embed/KD164GtjcCM
The real secret to stain removal is speed. You have to get to the spill before it has a chance to settle deep into the fibers and become a permanent resident. Different messes require different tactics—what works on a pet accident won't touch a greasy spot. Let's walk through some of the most common culprits and how to handle them with stuff you probably already have.
Fighting Off Pet Accidents and Odors
If you have pets, you know accidents are just part of the deal. The tricky thing about pet urine isn't just the stain; it's the stubborn smell that sticks around. That odor comes from uric acid crystals, which don't just rinse away with water. That's why plain old white vinegar is your best friend here.
First things first, grab a clean, dry towel and blot, blot, blot. Press down firmly to soak up as much as you can, but whatever you do, don't rub—that just spreads the mess. Once you've absorbed the excess, mix a solution of equal parts white vinegar and water in a spray bottle.
Go ahead and douse the spot with your vinegar mix. The acid in the vinegar is what breaks down the uric acid, which is the key to truly getting rid of the smell instead of just covering it up. Let it sit and work its magic for about 15 minutes, then come back and blot the area again with a fresh towel.
Expert Insight: For a final knockout punch against any lingering odor, sprinkle a thick layer of baking soda over the damp spot after the vinegar treatment. It will get cakey as it dries, which might take a few hours or even overnight. Once it's completely dry, just vacuum it all up. The baking soda pulls out any remaining moisture and odor.
Removing Red Wine and Berry Stains
Nothing causes panic quite like a red wine spill. But you can absolutely save your rug if you act fast. The tannins in the wine are what create that deep, purplish stain, so your mission is to lift them before they can bond with the fibers.
Immediately get a dry cloth and start blotting. Next, pour a little cool water directly on the stain to dilute it, and keep blotting. This little step helps keep the stain from spreading. If it's being stubborn, you can make a paste with one part baking soda and three parts water. Smear it on the stain, let it dry completely, and then vacuum it away.
Conquering Grease and Oil Spills
Greasy stains from things like food, sunscreen, or even a citronella candle can be a pain because oil and water don’t mix. For these, your first move isn't to add liquid—it's to absorb the grease.
Grab some cornstarch or baking soda and shake it generously all over the oily spot. These powders are fantastic at pulling oil right out of the rug fibers. Just let it sit for at least 20-30 minutes to give it time to work.
After you’ve let it sit, gently scrape the powder off and vacuum up what’s left. Now you can tackle the rest with a drop of a good grease-cutting dish soap. Work it into the spot with a soft brush and a bit of warm water, then rinse the whole area thoroughly with a hose to get all the suds out.
When it comes to common household spills, having a quick-reference guide can be a lifesaver. Here are a few tried-and-true solutions for some of the toughest stains you'll encounter.
Common Stain Removal Solutions
| Stain Type | Primary Cleaning Agent | Application Steps | Important Note |
|---|---|---|---|
| Pet Urine | White Vinegar & Baking Soda | 1. Blot spill. | |
| 2. Spray with 1:1 vinegar/water solution. | |||
| 3. Let sit 15 mins, then blot. | |||
| 4. Cover with baking soda, let dry, vacuum. | The vinegar neutralizes the uric acid that causes lingering odors. | ||
| Red Wine | Salt or Baking Soda Paste | 1. Blot immediately. | |
| 2. Cover with salt to absorb or apply a 3:1 water/baking soda paste. | |||
| 3. Let dry completely, then vacuum. | Speed is crucial. Don't let the wine set into the fibers. | ||
| Oil/Grease | Cornstarch & Dish Soap | 1. Cover with cornstarch for 20-30 mins. | |
| 2. Scrape and vacuum. | |||
| 3. Treat residue with a drop of dish soap and water. | Always absorb the oil first before applying any liquid. | ||
| Mildew | White Vinegar | 1. Mix equal parts vinegar and water in a spray bottle. | |
| 2. Saturate the mildew spots. | |||
| 3. Scrub with a soft brush and rinse thoroughly. | Ensure the rug dries completely in the sun to kill any remaining spores. |
This table is your go-to cheat sheet. By matching the stain to the right ingredients, you'll save yourself a lot of scrubbing and frustration.
Eliminating Mold and Mildew
If your outdoor rug is in a shady, damp spot, you might eventually run into some mold or mildew. It's not just ugly and smelly; it can actually damage the rug's backing over time if you let it go.
This little decision tree can help you figure out the best deep-cleaning method based on what your rug is made of and how dirty it is.
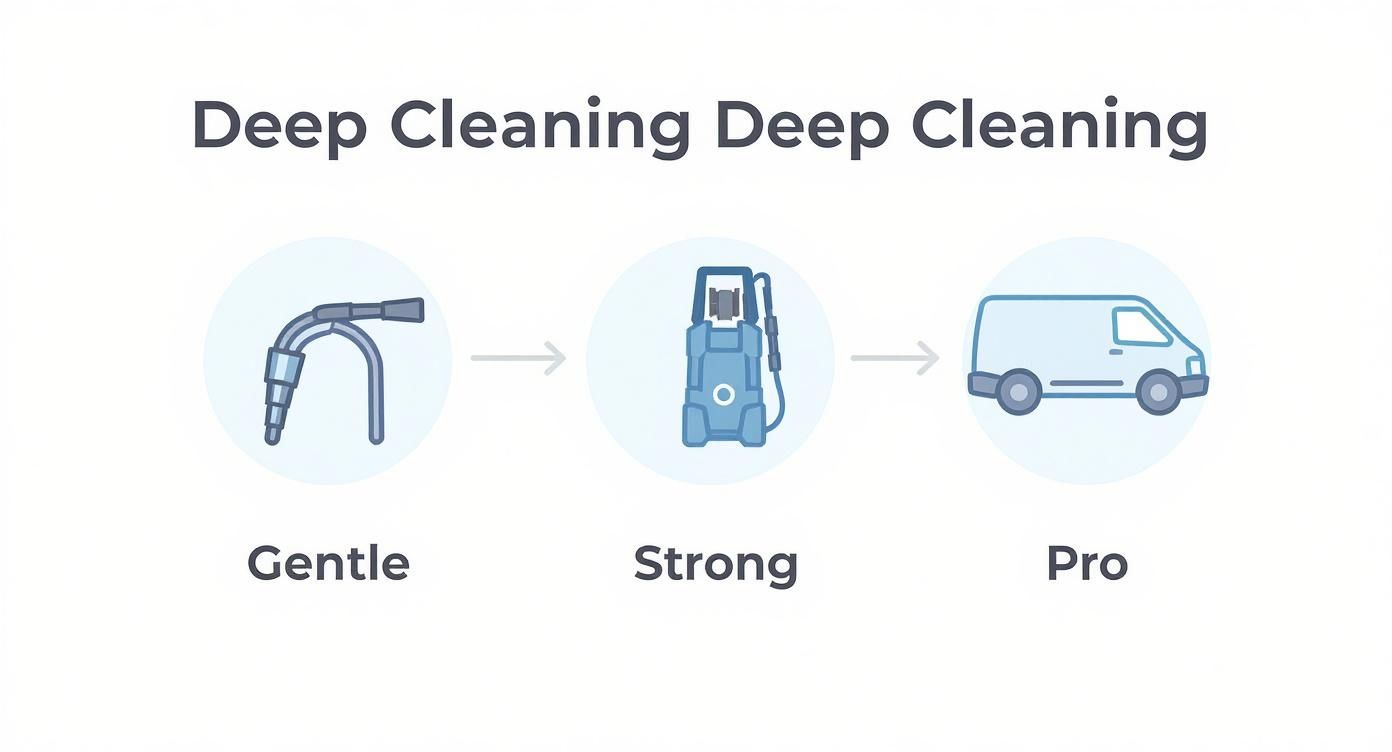
As the guide shows, a simple hosing-down is often enough. But for tougher, more durable rugs, a pressure washer can work wonders. And sometimes, for delicate or heavily soiled rugs, calling in a professional is the smartest and safest choice.
Getting Your Rug Dry and Stored Properly
You’ve done the hard work of scrubbing and rinsing, but don’t put everything away just yet. The final, and arguably most important, step in cleaning your rug is the drying process. I’ve seen it countless times—a perfectly clean rug ruined by musty odors or mildew simply because it wasn’t dried correctly.
Rushing this part of the job traps moisture deep within the rug's fibers and backing, creating a perfect breeding ground for fungus. A thoroughly dried rug not only smells fresh but also keeps its structure and color for years to come.
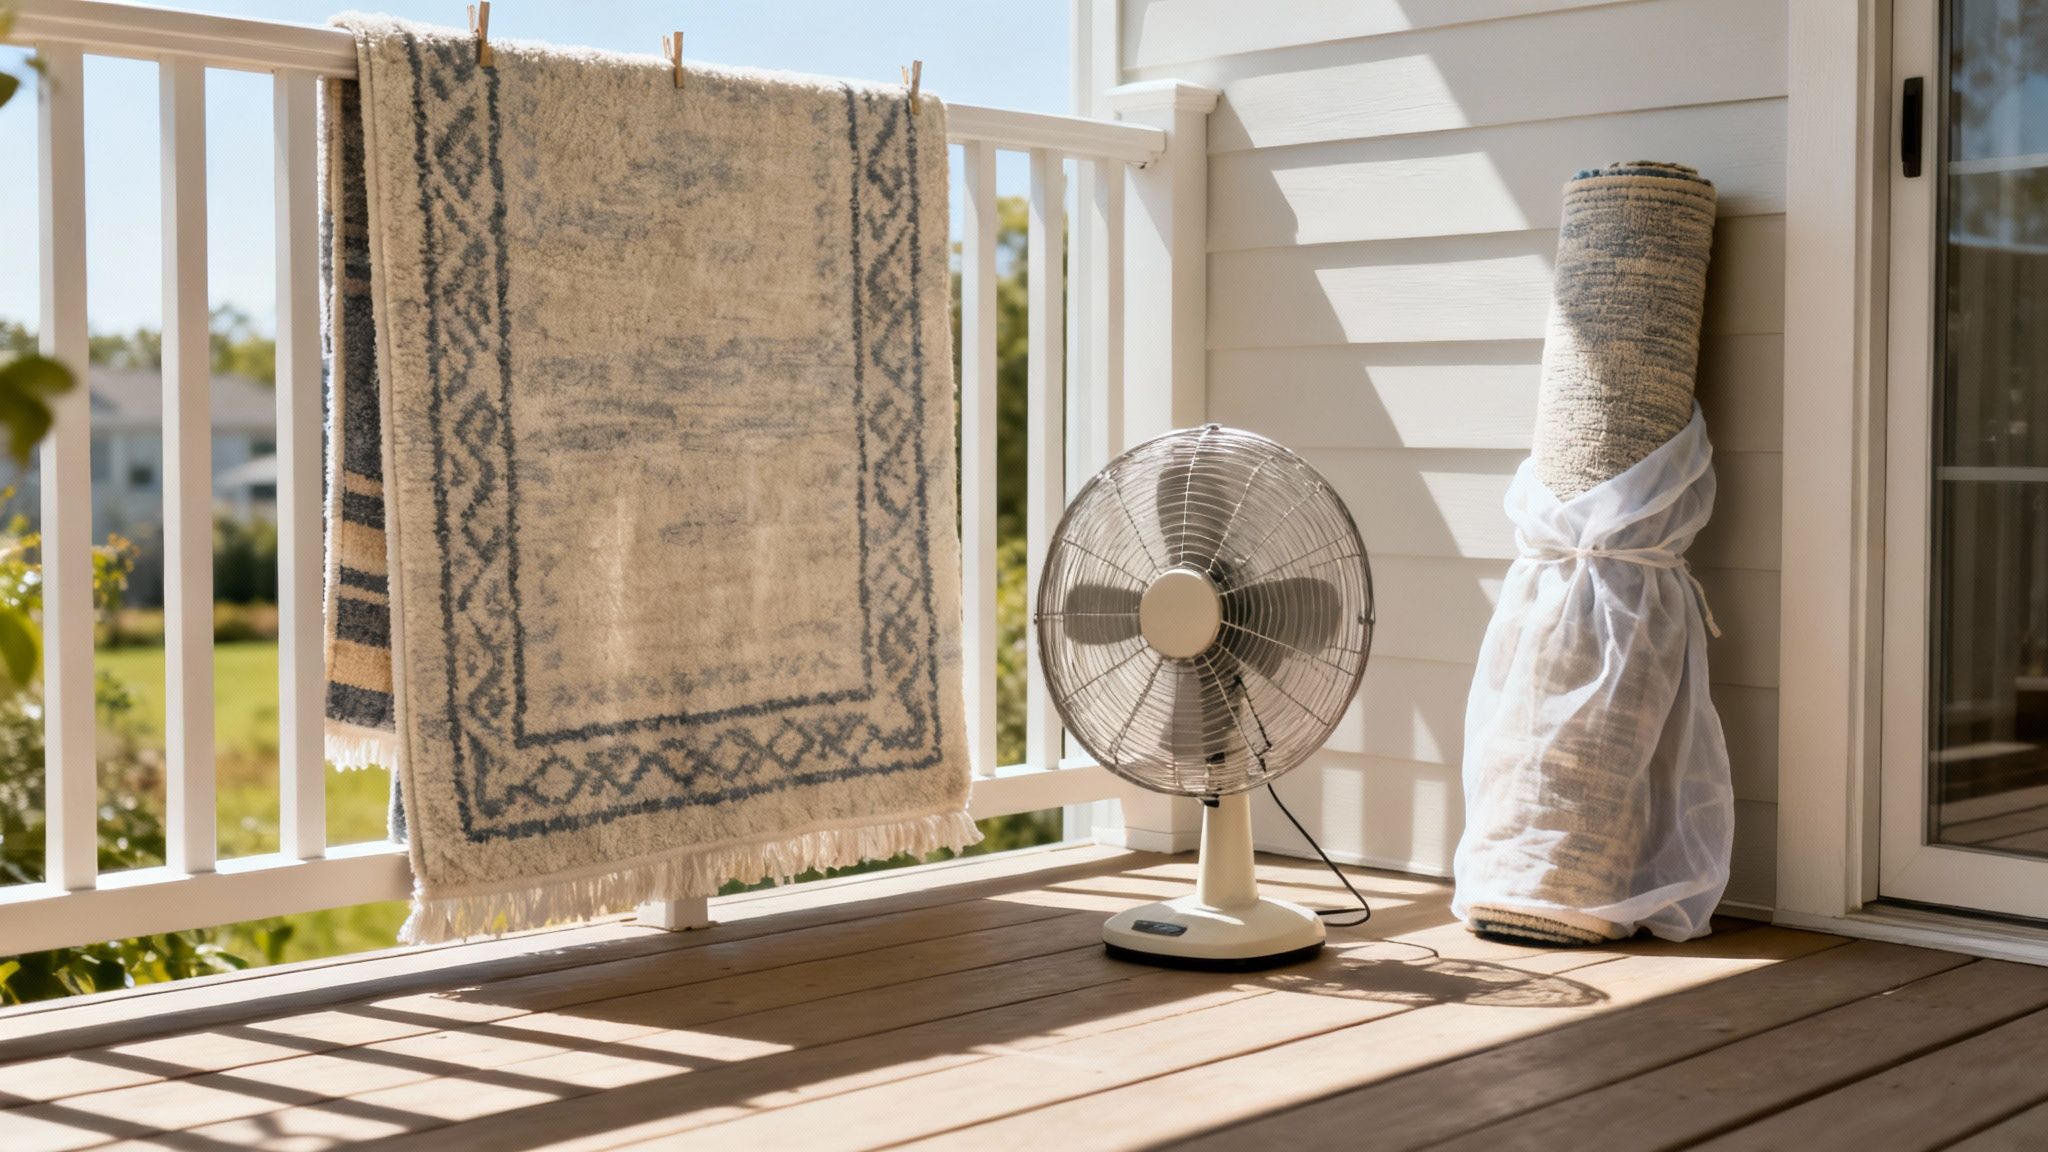
The Best Way to Dry Your Clean Rug
The secret to effective drying is simple: maximum airflow to both the front and back of the rug. This is where gravity and a bit of sunshine become your best tools.
Draping the rug over a sturdy deck railing, a pair of sawhorses, or even a couple of patio chairs is by far the best method. This lets air circulate freely on all sides, which dramatically speeds up the drying time.
If you don't have a good spot to hang it, laying the rug flat on a clean, sunny patch of driveway or patio is your next best bet. This approach just requires a little more attention. You'll need to flip the rug over after a few hours to make sure the underside gets equal time in the sun and air.
Crucial Tip: No matter how you do it, make sure the rug is 100% bone dry before you bring it back inside or put furniture on it. Get down there and feel the fibers and press on the backing. Even a hint of dampness can cause problems later on.
Learning how to dry wet carpet fast and prevent mould is a great skill, as the same principles apply here and can save you a lot of headaches.
Smart Storage for the Off-Season
When the weather turns and it’s time to store your rug for the winter, how you put it away is just as important as how you cleaned it. The right storage technique protects your rug from pests, moisture, and creasing, ensuring it looks fantastic when you unroll it next spring.
First and foremost, always roll, never fold. Folding creates deep, stubborn creases that might never come out. It also puts a lot of stress on the fibers and backing, which can lead to cracking and premature wear.
Start by rolling the rug tightly and evenly, keeping the patterned side facing inward. This protects the pile from dust and dirt. Once it’s a tight cylinder, secure it with a few pieces of twine or some fabric strips—just don’t tie them so tightly that they leave dents.
-
Choose the Right Wrap: You want to protect the rug but still let it breathe. Steer clear of plastic wrap, as it can trap moisture and invite mildew. Instead, use a breathable material like an old cotton sheet, a canvas drop cloth, or a specialized Tyvek rug wrap.
-
Find a Safe Spot: Store your rolled-up rug somewhere cool, dry, and climate-controlled. A dry corner of the basement, a spare closet, or an elevated spot in the garage are all good options. Just avoid damp areas or attics where temperatures swing wildly.
-
Elevate for Protection: Whenever possible, get the rug off the floor. Storing it on a shelf or across a few wooden blocks keeps it safe from potential spills or pests. It’s a simple step that acts as an insurance policy against the unexpected.
Taking these extra steps is all about protecting your investment, a principle that also fuels the professional cleaning industry. The global market for area rug cleaning was valued at USD 1.2 billion in 2024 and is expected to climb to USD 1.8 billion by 2033, which shows just how much people care about maintaining their rugs for the long haul. You can find more details about the growing professional rug care market and its trends.
Your Top Rug Cleaning Questions, Answered
Even with the best instructions, you're bound to have a few questions. That's totally normal. Every rug is different, and so is every patio, deck, or sunroom. Let's run through some of the most common things people ask so you can tackle your cleaning with confidence.
Think of this as your go-to FAQ for those "what if" moments. A little extra knowledge can save you a lot of guesswork and keep your rug looking fantastic for years.
How Often Should I Really Be Deep Cleaning This Thing?
This is probably the number one question, and the honest answer is: it depends entirely on where you put it and how much you use it. There’s no magic number, but here’s a good rule of thumb.
If your rug is out on an open patio, getting hit with rain, pollen, and muddy paws, you'll probably want to give it a good hose-down seasonally, so maybe four times a year. On the other hand, if it’s chilling in a protected three-season room or a covered porch with less foot traffic, you can easily get away with a deep clean just once a year.
Let the Rug Tell You: Your rug will give you hints. If the colors look dull and dingy even after a good vacuum, or if you can feel a gritty texture under your feet, it's time for a wash. Keeping up with weekly shaking and vacuuming will make a huge difference in how long you can go between the big cleans.
Can I Just Hit It With a Pressure Washer?
You can, but you need to be careful. A pressure washer can be a game-changer for blasting away caked-on grime, especially from tough synthetic rugs like polypropylene. But get it wrong, and you can literally shred the fibers or cause the colors to bleed.
The secret is to start gentle and work your way up.
-
Lowest Pressure, Always: Start with the absolute lowest pressure setting your machine has. You can always increase it if needed, but you can't undo damage.
-
Go Wide: Use a wide-angle nozzle, like a 40-degree tip (it’s usually the white one). This creates a fanned-out spray instead of a laser-like jet.
-
Keep Your Distance: Don't get right up on the rug. Stand back at least a foot or two and let the water do the work.
-
Sweep, Don't Stop: Use long, sweeping motions across the rug. Never hold the spray in one spot for more than a second.
And please, always test a small corner first. Pick an out-of-the-way spot to make sure the dye doesn't run and the fibers hold up before you go all-in.
What’s the Best Way to Get Rid of Mold and Mildew?
Forget the harsh chemicals for this one. Your best friend here is plain old white vinegar. Its natural acidity is perfect for killing mold and mildew spores without bleaching the color out of your rug.
Mix a simple solution of equal parts white vinegar and water in a spray bottle. Take the rug outside to a well-ventilated spot and spray the solution generously on any mildewed areas. Let it sit and work its magic for about an hour, preferably out of direct, intense sunlight.
After it’s had time to soak in, grab a soft-bristled brush and give the spots a gentle scrub to lift the stains. The final step is crucial: rinse the entire rug thoroughly with a hose to wash away the vinegar and all the junk you just loosened up. Then, let it dry completely in the sun—the UV rays will help kill off any lingering spores.
At Fluent Trends, we believe your living space doesn't end at your doorstep. Our curated collection of durable, stylish indoor-outdoor rugs is designed to handle whatever life throws at them while elevating your space. Find the perfect rug for your patio or sunroom by exploring our collection at https://www.fluenttrends.com.