
A Homeowner's Guide to Removing Scratches from Wood Furniture
Yuatinia LeakThat sinking feeling when you spot a fresh scratch on a cherished heirloom or a bespoke teak table is universal. But before you reach for the sandpaper, take a deep breath. In the world of premium wood care, the first step is always a moment of quiet observation: Assess the damage. A simple "fingernail test" is often all that stands between a five-minute fix and a full-scale restoration project.
Your First Steps for Fixing Scratched Wood
Before you even think about reaching for a wax stick or mineral spirits, you must understand the "topography" of the damage. The success of any repair boils down to correctly identifying the scratch's depth. This initial diagnosis prevents you from over-treating a minor blemish and ensures you use a method that preserves the wood's natural patina rather than stripping it away.
For a masterclass in professional-grade restoration strategies, I recommend exploring this complete guide to restoring scratched wood.
The Value of the Repair
It is no surprise that homeowners are increasingly choosing to repair rather than replace. The global market for wood furniture repair is projected to climb from $3.4 billion to $5.7 billion by 2032. This shift isn't just a savvy financial move—it’s a commitment to Restorative Luxury. By fixing a piece, you are reducing your carbon footprint, conserving high-quality timber like oak and walnut, and keeping millions of tons of furniture out of landfills annually.
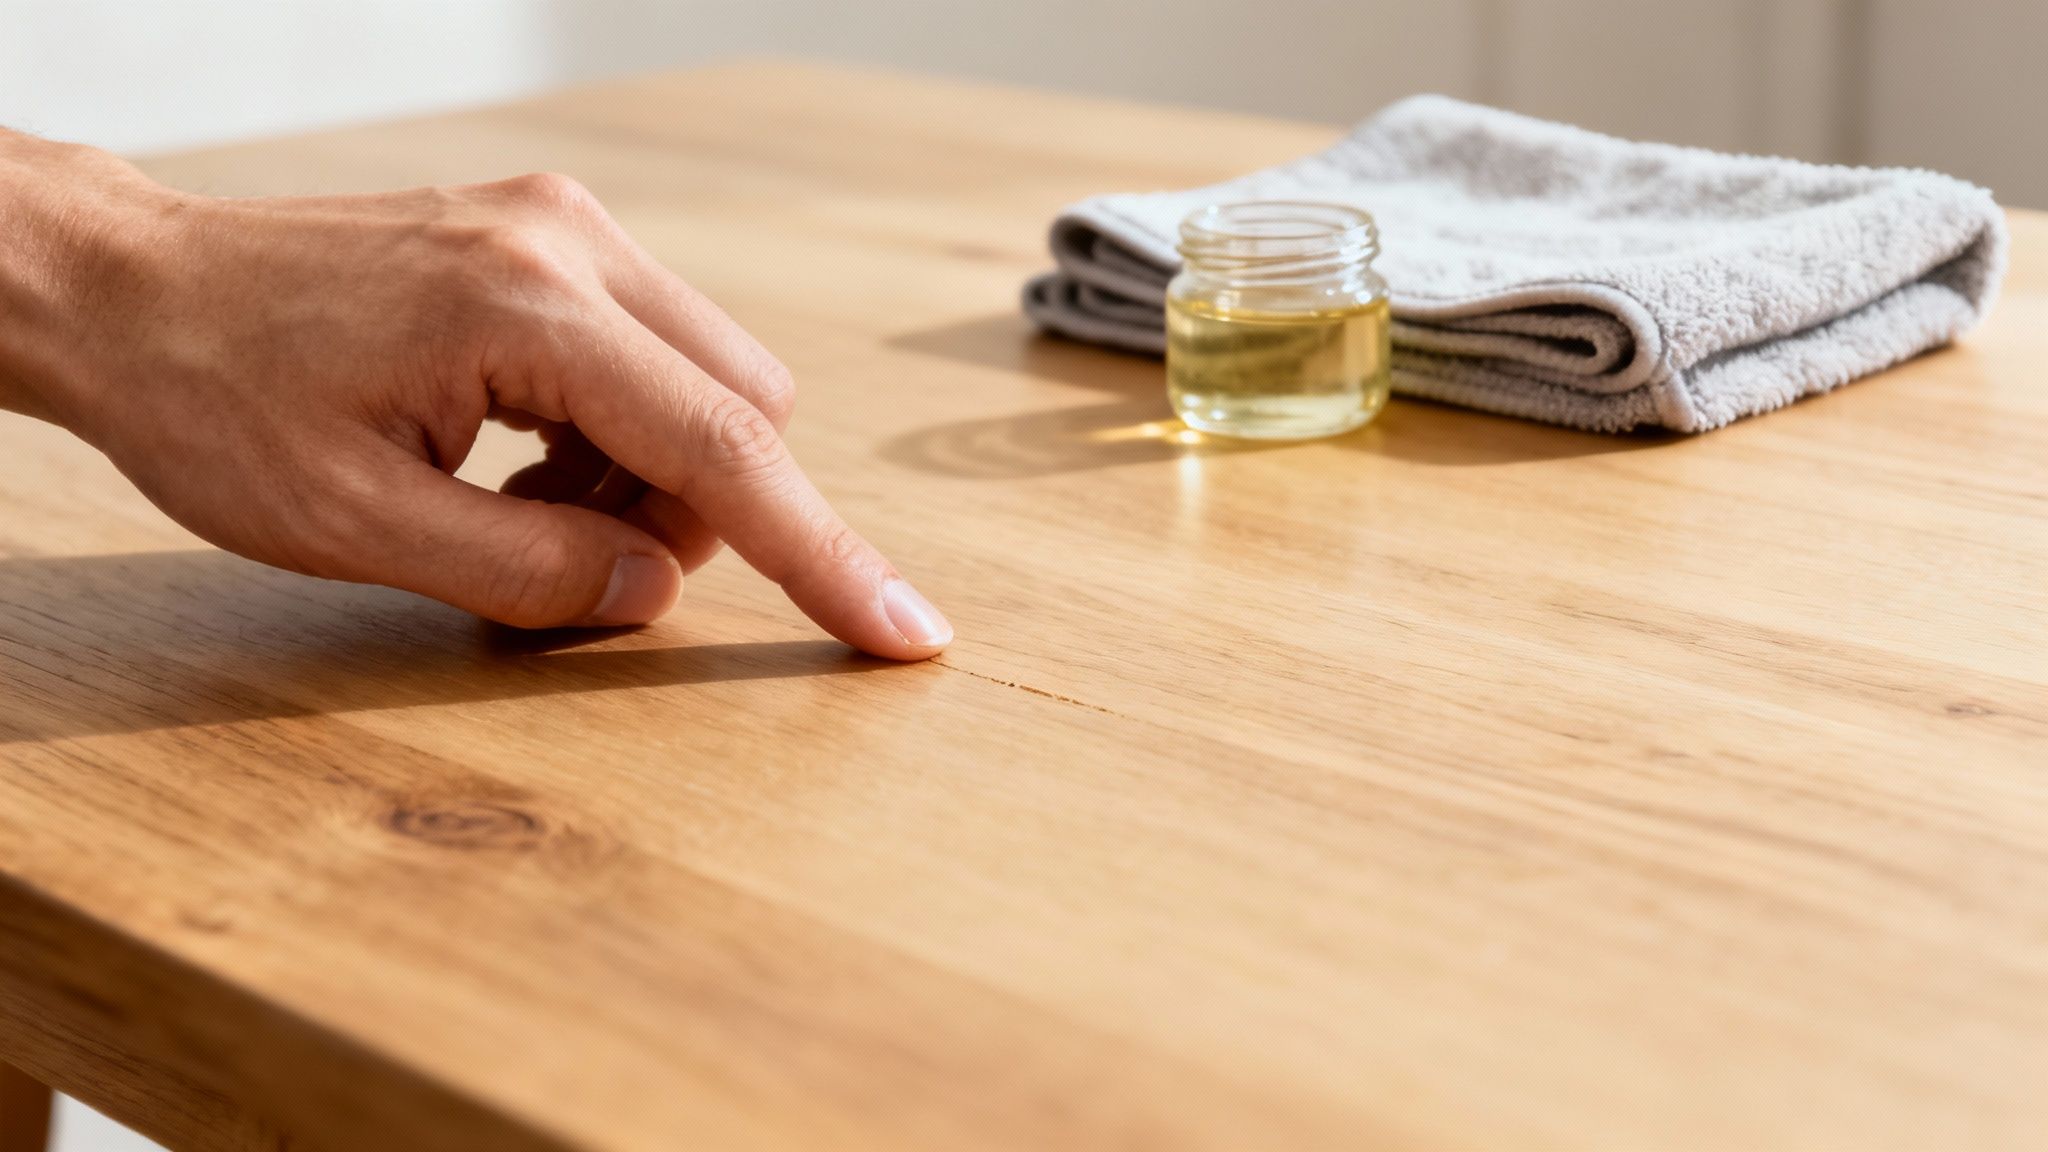
The Fingernail Test: Reading the Grain
To determine your path forward, gently run your fingernail across the scratch, moving perpendicular to the mark:
-
Surface Scuff: If your nail glides over without catching, the damage is likely only in the wax or clear coat. These are "Level 1" fixes that often require nothing more than a bit of buffing and the right oil.
-
Medium Scratch: If your nail catches slightly, the scratch has penetrated the finish and touched the wood fibers. This requires "Level 2" blending with stain markers or wax sticks.
-
Deep Gouge: If your nail sinks in or catches significantly, the wood fibers are torn. This "Level 3" damage requires fillers, precision sanding, and a careful re-application of the finish to restore the "Whiff" of perfection.
Quick Guide to Assessing Wood Scratches
To simplify your diagnosis, use the reference table below to identify the severity of the blemish and determine your strategic first move.
| Scratch Type | How It Looks and Feels | Best First Step |
|---|---|---|
| Surface Scuff | A light, discolored line. Your fingernail glides right over it. | Concealment with polish, oil, or a touch-up marker. |
| Minor Scratch | A shallow groove you can just feel with a fingernail. | Often fixed with a wax filler stick or a blend-in pencil. |
| Deep Gouge | A noticeable groove where wood is clearly missing. Your nail gets stuck. | Requires filling with wood putty or a hard wax stick. |
This quick assessment provides the confidence to select the right tool for the job without risking further damage to the wood's patina. Once you’ve identified the depth, you can proceed with precision.
While we will explore advanced filler techniques for deeper gouges later, many minor scuffs can be addressed with specialized home-blended solutions. And remember, the most effective restoration strategy is a proactive one. Establishing a routine of protecting your furniture from the elements is the secret to lifelong durability.
Assembling Your Furniture Repair Toolkit
A master-level repair begins long before you touch the wood; it starts with the intentional preparation of your workspace. Gathering your essentials beforehand prevents the mid-project scramble and allows you to focus on the tactile "Whiff" of the restoration process.
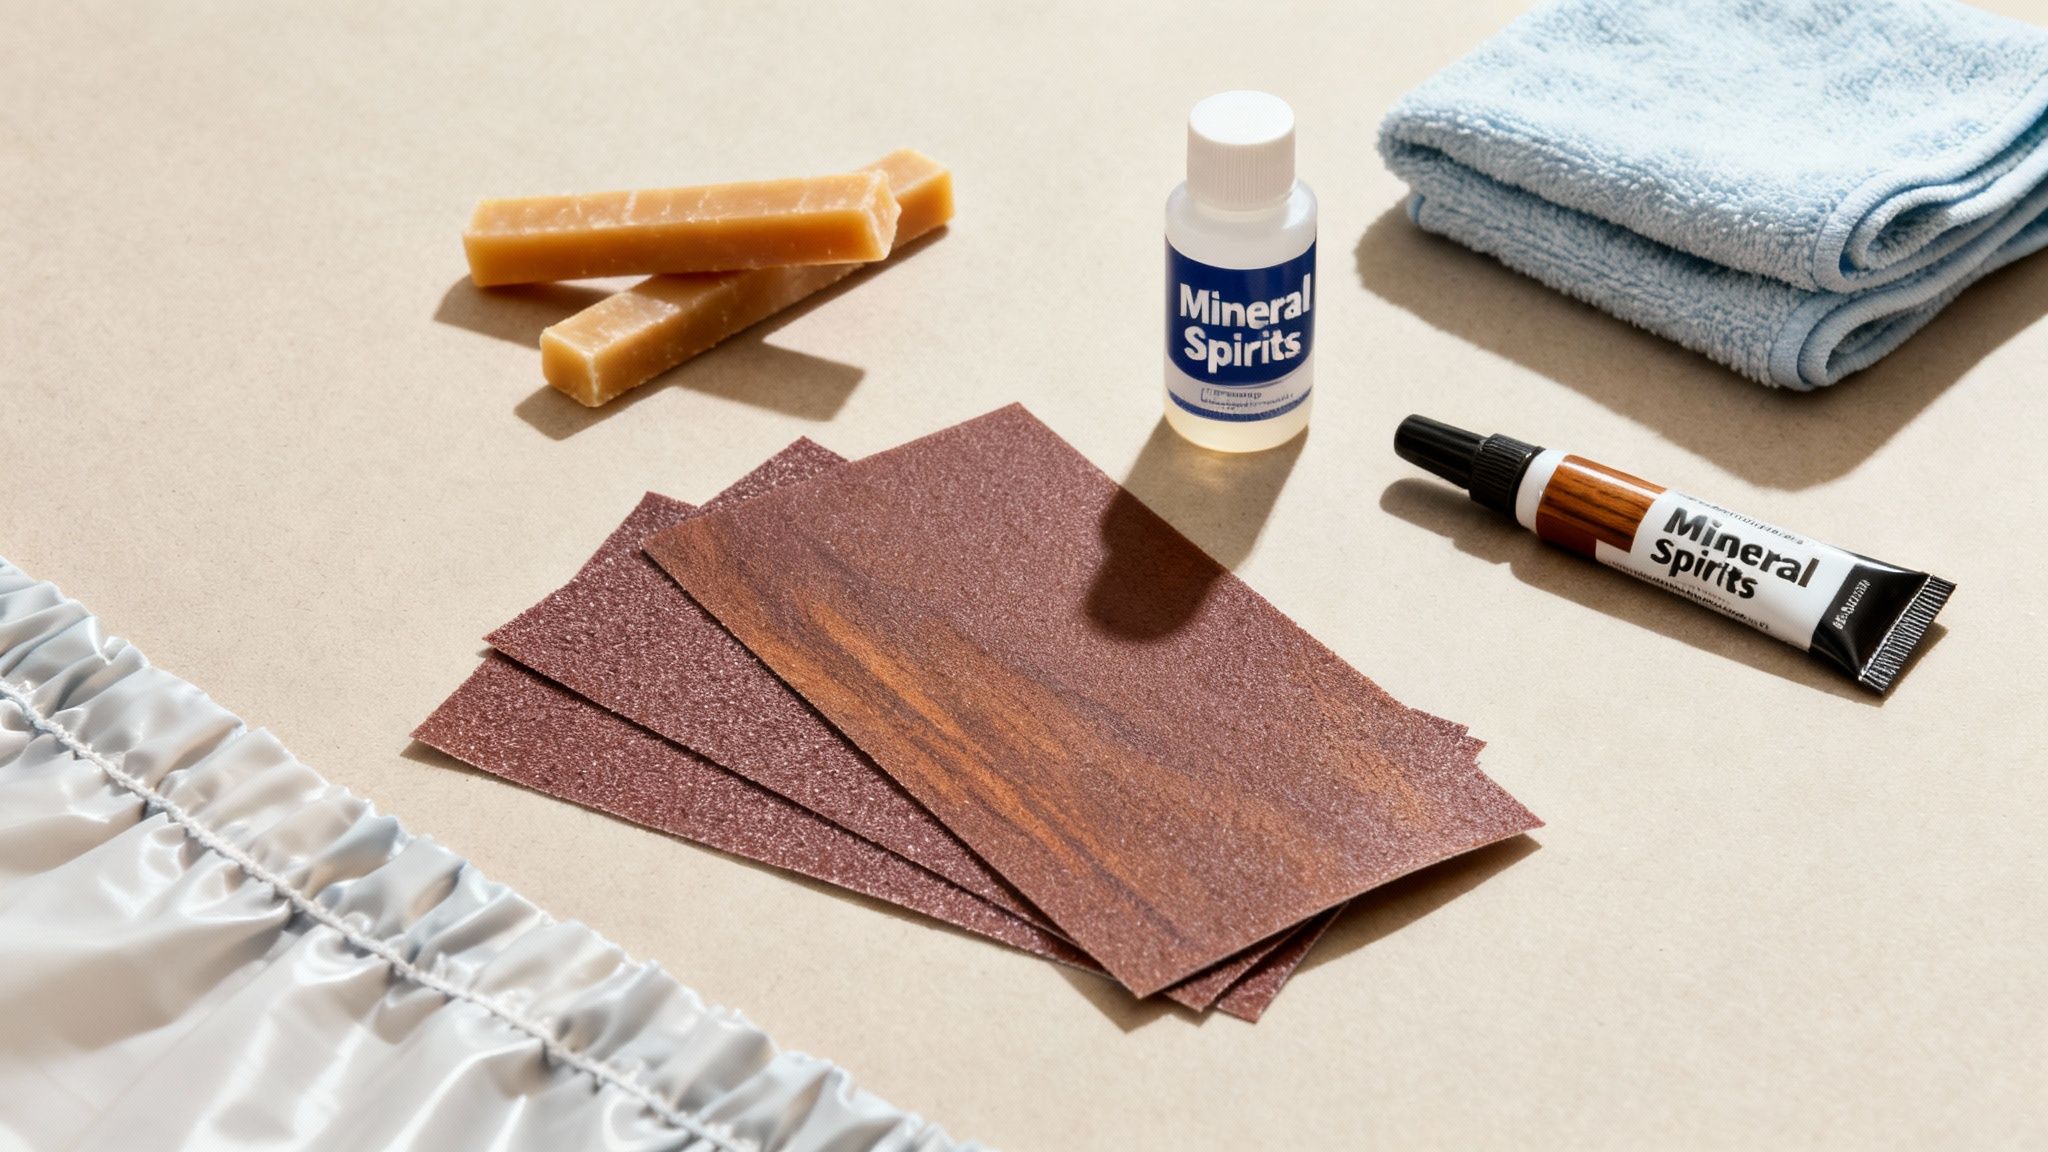
The non-negotiable anchor of your kit is a set of clean, microfiber cloths. Unlike standard towels, these ensure you aren’t leaving lint behind or—worse—introducing micro-abrasions to the finish as you work.
Cleaning and Prep Essentials
Before the repair begins, the surface must be chemically clean. Many household cleaners contain silicones that create a "resist" layer, causing wood fillers to bead up and fail.
-
Mineral Spirits: A specialized solvent that safely cuts through wax and grease without compromising the existing finish. Use sparingly on a clean cloth.
-
Protective Gear: Nitrile gloves are essential to protect your skin from stains, while safety glasses ensure a splash-free environment.
-
Drop Cloths: Protect your flooring with a heavy towel or sheet to catch any over-application of oils or spirits.
The most common failure in DIY restoration is skipping the prep. A debris-free surface is the foundation of a repair that truly disappears. Five minutes of cleaning saves five hours of frustration.
Precision Tools for the Repair Itself
With your surface prepped, you can move to the restorative tools.
-
Touch-Up Kits: A variety of shades allows for "optical blending"—matching the light and dark shifts in the natural grain.
-
Soft Wax Sticks: Essential for deep gouges; these can be melted and mixed to create a custom color match.
-
Abrasives: Keep 220-grit sandpaper for leveling fillers and 0000-grade steel wool for final sheen blending.
The Craft of the Quick Fix: Level 1 & 2 Techniques
Now that your kit is staged and your workspace is prepped, we can address the Surface Scuffs and Minor Scratches identified in our assessment. These techniques focus on "Level 1" and "Level 2" repairs—where the goal is to swell the wood fibers and blend the finish back into a seamless, glowing whole.
The "Whiff" Restoration Blend (Level 1)
For those light, discolored lines where the wood itself isn't torn, you can often achieve a professional result using a refined household ratio. This is a favorite among minimalist restorers because it avoids the "plastic" look of commercial aerosol sprays.
-
The Ratio: Mix 3 parts olive oil to 1 part white vinegar.
-
The Method: Dab the solution onto a clean microfiber cloth. Rub firmly in the direction of the grain, not across it.
-
The Why: The vinegar acts as a very mild solvent to soften the existing finish just enough to let it move, while the oil nourishes the wood and restores the deep, original luster—the true Whiff of a well-maintained home.
-
Pro Tip: Let the mixture sit for 2–5 minutes before buffing it dry with a fresh cloth to ensure the fibers have fully absorbed the moisture.
Level 2: The Art of the Precision Blend
If your fingernail caught slightly during the assessment, the scratch has broken the "seal" of the finish. This requires a bit more technical finesse to ensure the repair doesn't look like a "patch."
-
Step 1: Fine-Grit Smoothing: Very gently buff the scratch using 0000-grade steel wool. This is the finest grade available and is essential for smoothing the "lips" of the scratch so the color can lay flat.
-
Step 2: Strategic Color Matching: Use a wood touch-up marker that is one shade lighter than your furniture. Start in the center of the scratch and move outward. It is much easier to add a second layer to go darker than it is to remove a mark that is too heavy-handed.
-
Step 3: The Final Sheen: Once the color is set (usually about 30 seconds), use a dry microfiber cloth to buff the area in circular motions. This "feathers" the edges of the repair into the surrounding wood, making your handiwork virtually invisible.
Tackling Minor Scuffs with Simple Fixes
For those surface-level scuffs—the kind that are maddeningly visible but haven't actually dug into the wood—you can often skip the specialized repair kits. Believe it or not, some of the best remedies for removing scratches from wood furniture are hidden in your kitchen. These quick fixes are about Natural Color Blending: subtly darkening the mark so it vanishes into the original patina.
The Golden Rule: Always start small and test your solution on a hidden spot first—the underside of a table or the back of a leg is your insurance policy against accidental discoloration.
The Classic Walnut Trick for Light Woods
This is one of the oldest secrets in the restorer's book for a reason: it works. The walnut is ideal for lighter woods like oak, maple, or pine, where a dark synthetic filler would look out of place.
-
The Science: The meat of a raw walnut contains natural oils and a light brown pigment that perfectly mimics the organic "Whiff" of fresh wood.
-
The Method: Crack a raw walnut and rub the meat directly into the scratch, moving with the grain. You’ll see the wood "drink" the oil and darken instantly.
-
The Finish: Let it sit for 5–10 minutes, then buff with a soft, clean cloth. The oil conditions the wood while the color camouflages the damage.
Pro Tip: No walnut on hand? An almond or a pecan can work in a pinch. You're simply looking for a nut with enough natural oil to gently hydrate the scuff without reaching for harsh chemicals.
Using Brewed Tea for Medium-Toned Woods
For cherry or mahogany pieces with reddish or medium-brown finishes, your secret weapon is the tannin found in black tea.
-
Concentrate the Brew: Steep one black tea bag in just a few tablespoons of hot water for at least five minutes. You want a "stain-strength" brew.
-
Apply with Precision: Use a cotton swab to dab the tea only inside the scratch to avoid darkening the surrounding finish.
-
Layer for Depth: Blot any excess with a paper towel. Once dry, repeat the process until the scratch perfectly matches the surrounding wood tone.
An Iodine Solution for Dark Wood Finishes
When you’re dealing with the deep, rich tones of dark walnut or ebony, you need a solution with more "oomph." A small amount of iodine is a lifesaver for these darker finishes.
-
The Approach: Its deep reddish-brown color is a near-perfect match for old-world mahogany.
-
The Technique: Apply a tiny drop directly into the gouge with a cotton swab. If the iodine appears too red, mix it with a dab of mineral oil first to tone it down. The wood will absorb the color, making the scratch vanish into the dark finish.
Repairing Deeper Gouges in Wood
When a scratch breaks through the topcoat and tears into the actual wood fibers, it moves from a surface scuff to a structural void. At this stage, we are no longer just concealing; we are rebuilding. While this requires a shift in mindset, it remains an achievable restoration that adds to the storied "Whiff" of an heirloom piece.
Choosing Your Medium: Wax Sticks vs. Wood Putty
The first big decision in a structural repair is choosing which filler to use. This choice depends entirely on the location of the damage and the "Whiff" of the final finish you want to achieve.
-
Soft Wax Filler Sticks: These are fantastic for the kind of dings and gouges you typically find on dining tables or dressers. They come in a wide range of colors that you can blend together to match almost any wood grain. Plus, wax is forgiving—if you aren't happy with the result, you can gently warm it and start over.
-
Wood Putty: Think of this as the "heavy-hitter" for deeper structural losses or high-traffic areas. It dries rock-hard and can be sanded or stained, but it requires more precision because it is a permanent solution.
You aren't alone in seeking these professional-grade solutions. The market for wood floor scratch repair markers hit $412 million in 2024, and the larger furniture wood coating market is expected to reach an incredible $12.3 billion by 2035. For a deeper dive into these industry trends and the shift toward high-end restoration, you can explore the latest reports on Dataintelo.com.
Applying Soft Wax Filler Sticks
For most "Difficulty 4" interior repairs, wax sticks are the preferred tool because they allow for "Optical Layering"—the process of building color depth that matches the wood’s natural shifts.
The Professional Approach
-
Pick Your Palette: Grab two or three wax sticks—one that matches the lightest tone in the wood, one for the medium shades, and another for the darkest grain lines.
-
Start Light: Rub the lightest color firmly across the gouge to slightly overfill it; the excess will be handled in the next step.
-
Scrape It Flush: Use a plastic scraper or even an old credit card held at a 45-degree angle to gently remove the excess wax until the filled area is perfectly level with the surrounding surface.
-
Add the Details: Use the sharp tip of a darker wax stick to carefully draw in a few thin lines that copy the wood's natural grain pattern.
-
Blend and Buff: Use your fingertip or a soft, clean cloth to blend the lines and soften the look, followed by a final buff to match the sheen of the original finish.
Here’s a little trick I picked up from a pro restorer: If you have a really narrow or deep gouge, quickly pass a lighter over the tip of the wax stick for just a split second. The slightly melted wax will flow right into the tight space, giving you a much more solid and complete fill.
Perfecting the Finish to Hide Your Repair
The final stage of a Difficulty 4 repair is where the real artistry happens. Making a structural repair truly vanish requires matching the existing finish flawlessly. This is less about force and more about being a careful observer of the wood's "Whiff"—blending your patch until it melts into the surrounding grain.
The Level 4 Technical Peak: Sanding and Leveling
Before applying your topcoat, the repair must be perfectly level. For deep gouges filled with wood putty, follow a strategic sanding progression:
-
Initial Leveling: Use 220-grit sandpaper to take down the bulk of the dried filler until it is nearly flush with the wood.
-
The Precision Refine: Switch to 400-grit sandpaper for the final pass. This ultra-fine grit smooths the wood fibers and the filler simultaneously, creating a glass-like surface ready for the finish.
-
Pro Tip: Always sand in the direction of the grain. Cross-grain sanding creates micro-scratches that will be painfully visible once the topcoat is applied.
Identifying Your Finish
Before you apply a sealer, you must identify your furniture's original protective layer. Find an inconspicuous spot—like the underside of a shelf—and dab a bit of denatured alcohol on a cotton swab.
-
Shellac: If the finish becomes sticky or dissolves, it’s shellac.
-
Varnish/Polyurethane: If there is no reaction, you are likely dealing with a modern, durable varnish or polyurethane finish.
Applying the New Finish with Precision
Delicate application is the name of the game. For tiny touch-ups, a small artist's brush provides the control needed to apply a whisper-thin layer only on the repaired area. For larger fixes, a lint-free cloth is ideal for applying wipe-on polyurethane or oil finishes, allowing you to "feather" the edges from the center outward so the new layer blends naturally into the old.
The secret to a perfect blend is patience. It is always better to apply two or three whisper-thin coats, allowing for full evaporation between layers, than to risk a single 'goopy' application that ruins the clarity of the grain.
Curing and Final Sheen Unification
Don't rush the drying process. Curing time is absolutely non-negotiable. If you get impatient, you'll end up with a soft, tacky spot that acts like a magnet for dust and ruins all your hard work. Always check the product’s instructions, but most finishes need at least 24 to 48 hours to cure properly—and sometimes even longer if it’s humid.
Curing time is non-negotiable. Most professional finishes require 24 to 48 hours to reach full structural integrity. Rushing this process creates a tacky surface that acts as a magnet for dust.
For extensive damage on larger surfaces, such as floors, you may need to explore professional hardwood floor resurfacing or refinishingto achieve a uniform look. Once cured, perform a final buffing with high-quality furniture paste wax and a soft cloth to unify the sheen across the entire piece. For more on identifying your piece's specific wood species and heritage, consult our Essential Furniture Style Guide.
Time to Call in a Pro? Here's How to Know
As much as we advocate for the craft of DIY restoration, a true expert knows when to "fold 'em." Attempting to fix certain types of damage without specialized training can do more harm than good, especially on a piece with deep sentimental or financial value. Recognizing your limits isn't admitting defeat—it's the smartest strategy for protecting your home’s "Whiff" of history.
So, when should you put down the walnut and pick up the phone?
-
Valuable Antiques: A botched DIY repair can tank the appraisal value of a historic piece.
-
Complex Finishes: If your furniture features hand-rubbed oils or complex, multi-layered lacquers, matching that specific glow is a professional-level task.
-
Structural Damage: Deep gouges accompanied by cracks or significant water damage are officially in professional territory.
When You Absolutely Need an Expert's Touch
A professional restorer brings more than just sandpaper to the table; they bring a trained artist's eye for color theory and a deep understanding of how specific wood species behave over decades.
"A true professional isn’t just patching a hole. They’re preserving the integrity of your furniture, often using period-appropriate, reversible materials—a factor that is critically important for high-value investments."
The industry is also evolving rapidly. Modern restorers now utilize UV curing technology to create incredibly durable repairs in a fraction of the time. You can see how these advancements are shaping the future in the latest reports on the wood furniture repair service market.
Common Questions About Fixing Wood Scratches
Can I Just Use a Black Marker to Cover a Scratch?
It’s a tempting shortcut, but one you'll likely regret. Standard permanent markers often contain purple or blue undertones that clash with natural wood. Worse, the ink can bleed into the surrounding grain, creating a permanent stain. Always opt for translucent furniture touch-up markers designed to mimic real wood tones
How Do I Find the Right Stain Color?
Matching stain is more art than science. The golden rule is to start one shade lighter than you think you need. You can always layer to go darker, but lightening a deep stain is a massive headache. Always perform a test on a hidden area, like the back of a leg, before proceeding.
Will Repairing a Scratch on an Antique Ruin Its Value?
For everyday modern furniture, the techniques we’ve covered are safe and effective. However, for a historic antique, an improper DIY fix can significantly decrease its value.
"If it's a sentimental heirloom, a careful DIY fix is fine. But when in doubt—especially with a piece of monetary value—always get a professional consultation first."
A Final Word from Yuatinia
At Fluent Trends, I believe your home should be more than just a place to store your belongings—it should be a sensory haven that reflects your journey. Every scratch on a wooden table tells a story, and knowing how to restore that "Whiff" of original beauty is part of the art of intentional living.
Whether you are meticulously reviving a family heirloom or simply maintaining the pieces you love, remember that the most beautiful homes are those that are cared for with patience and purpose.
I invite you to Explore Fluent Trends to discover our curated collection of designer-approved furniture and decor. From timeless wooden textures to the modern strength of concrete, let's find the pieces that will help you write your home's next chapter.
To your home's enduring beauty,
Yuatinia Leak
Founder, Fluent Trends